# Google
This guide provides a step-by-step walkthrough to configure Google as an external identity provider for Akamas users.
{% hint style="info" %}
You will need a Google account with the privileges required to create *app registrations*.
{% endhint %}
## Configure the App registration
To integrate Akamas with your Google Workspace, create a project with a dedicated OAuth client in the **Google Developer Console**.
* **Log in** to your Google Developer Console.
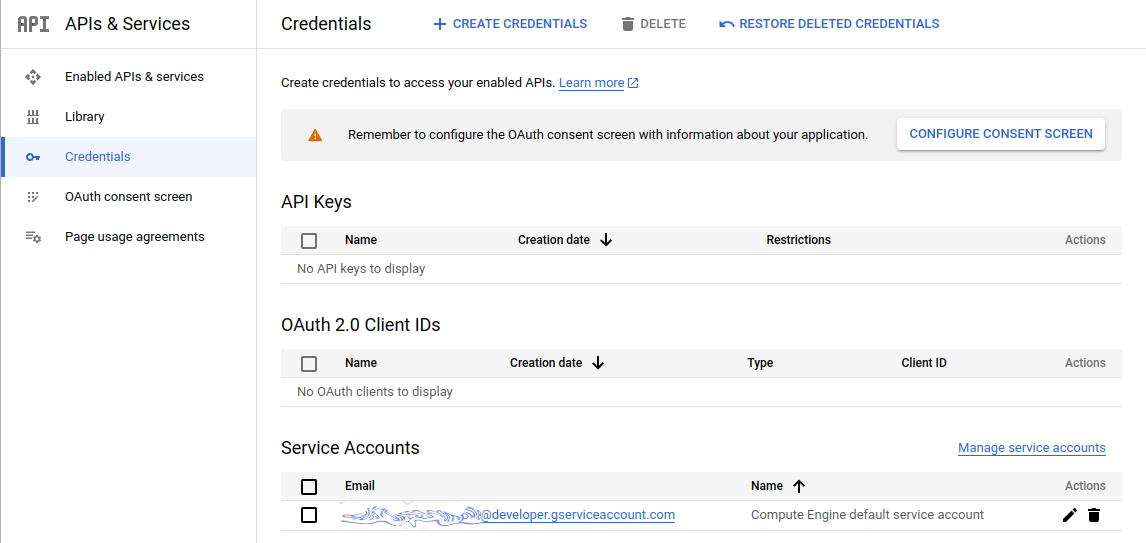
* Go to the **API & Services** section and navigate to [**Credentials**](https://console.cloud.google.com/apis/credentials).
### Configure the Consent Screen
If a warning prompts you to configure the consent screen, you’ll need to create an app for user consent.
* Click on the provided button to launch the **Consent Screen Wizard**.
* Follow the wizard to configure the *consent screen* according to your company's policies. For more details, refer to [Configure the OAuth consent screen](https://developers.google.com/workspace/guides/configure-oauth-consent) on the official documentation.
Once the consent screen configuration is complete, return to the [**Credentials** ](https://console.cloud.google.com/apis/credentials)page.
### Create the OAuth client
* On the **Credentials** page, select **Create Credentials** and choose **OAuth Client ID**.
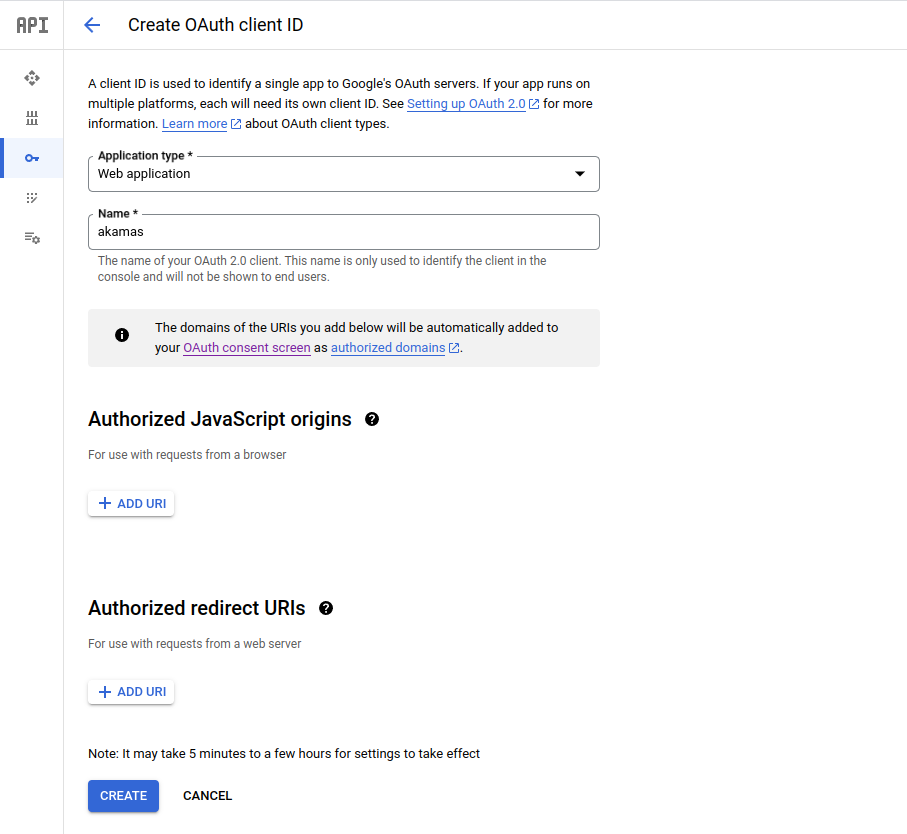
* Configure the client as follow:
* **Application Type:** Choose "Web application."
* **Name:** Enter a name for the new client.
* **Authorized redirect URIs:** Leave this blank for now; you’ll configure it in a later step.
After clicking **Create**, a confirmation popup will display the **Client ID** and **Client Secret**. Make note of these values.
## Create the Identity provider
In the Keycloak admin console, go to the **Identity Providers** section within the **Akamas** realm (see [](https://docs.akamas.io/akamas-docs/3.6/managing-akamas/users-management/configure-an-external-identity-provider "mention") for more details).
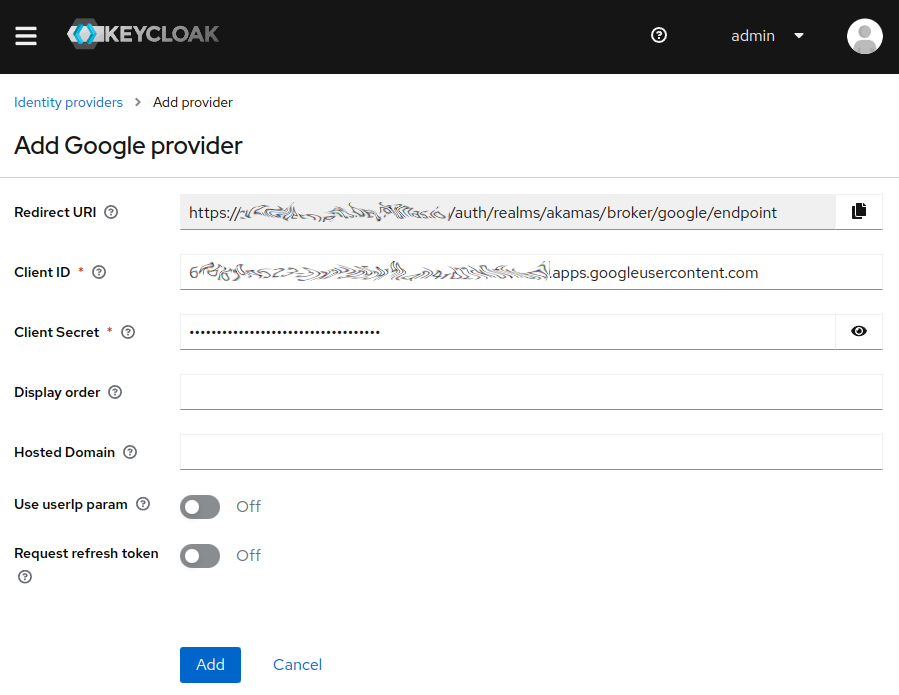
* Select **Google** as the provider type.
* Fill in the following fields using the values from the OAuth client:
* **Client ID:** Enter the Client ID from the Google Developer Console.
* **Client Secret:** Enter the Client Secret.
Copy the **Redirect URI** generated by Keycloak and click **Add** to save the configuration.
## Complete the app registration
Return to the **Credentials** page in the Google Developer Console. Open the newly created OAuth client, and in the **Authorized Redirect URIs** section, add the Redirect URI copied from Keycloak.
{% hint style="warning" %}
If the hostname of the Akamas installation changes, update the **Redirect URI** in the app registration to avoid login errors such as:
> The redirect URI 'https\://...' specified in the request does not match the redirect URIS configured for the application '...'.
> {% endhint %}
## Configure the default Akamas roles
To automatically assign default roles to users, set up mappers in Keycloak so users can access the default workspace with read and write permissions upon first login.
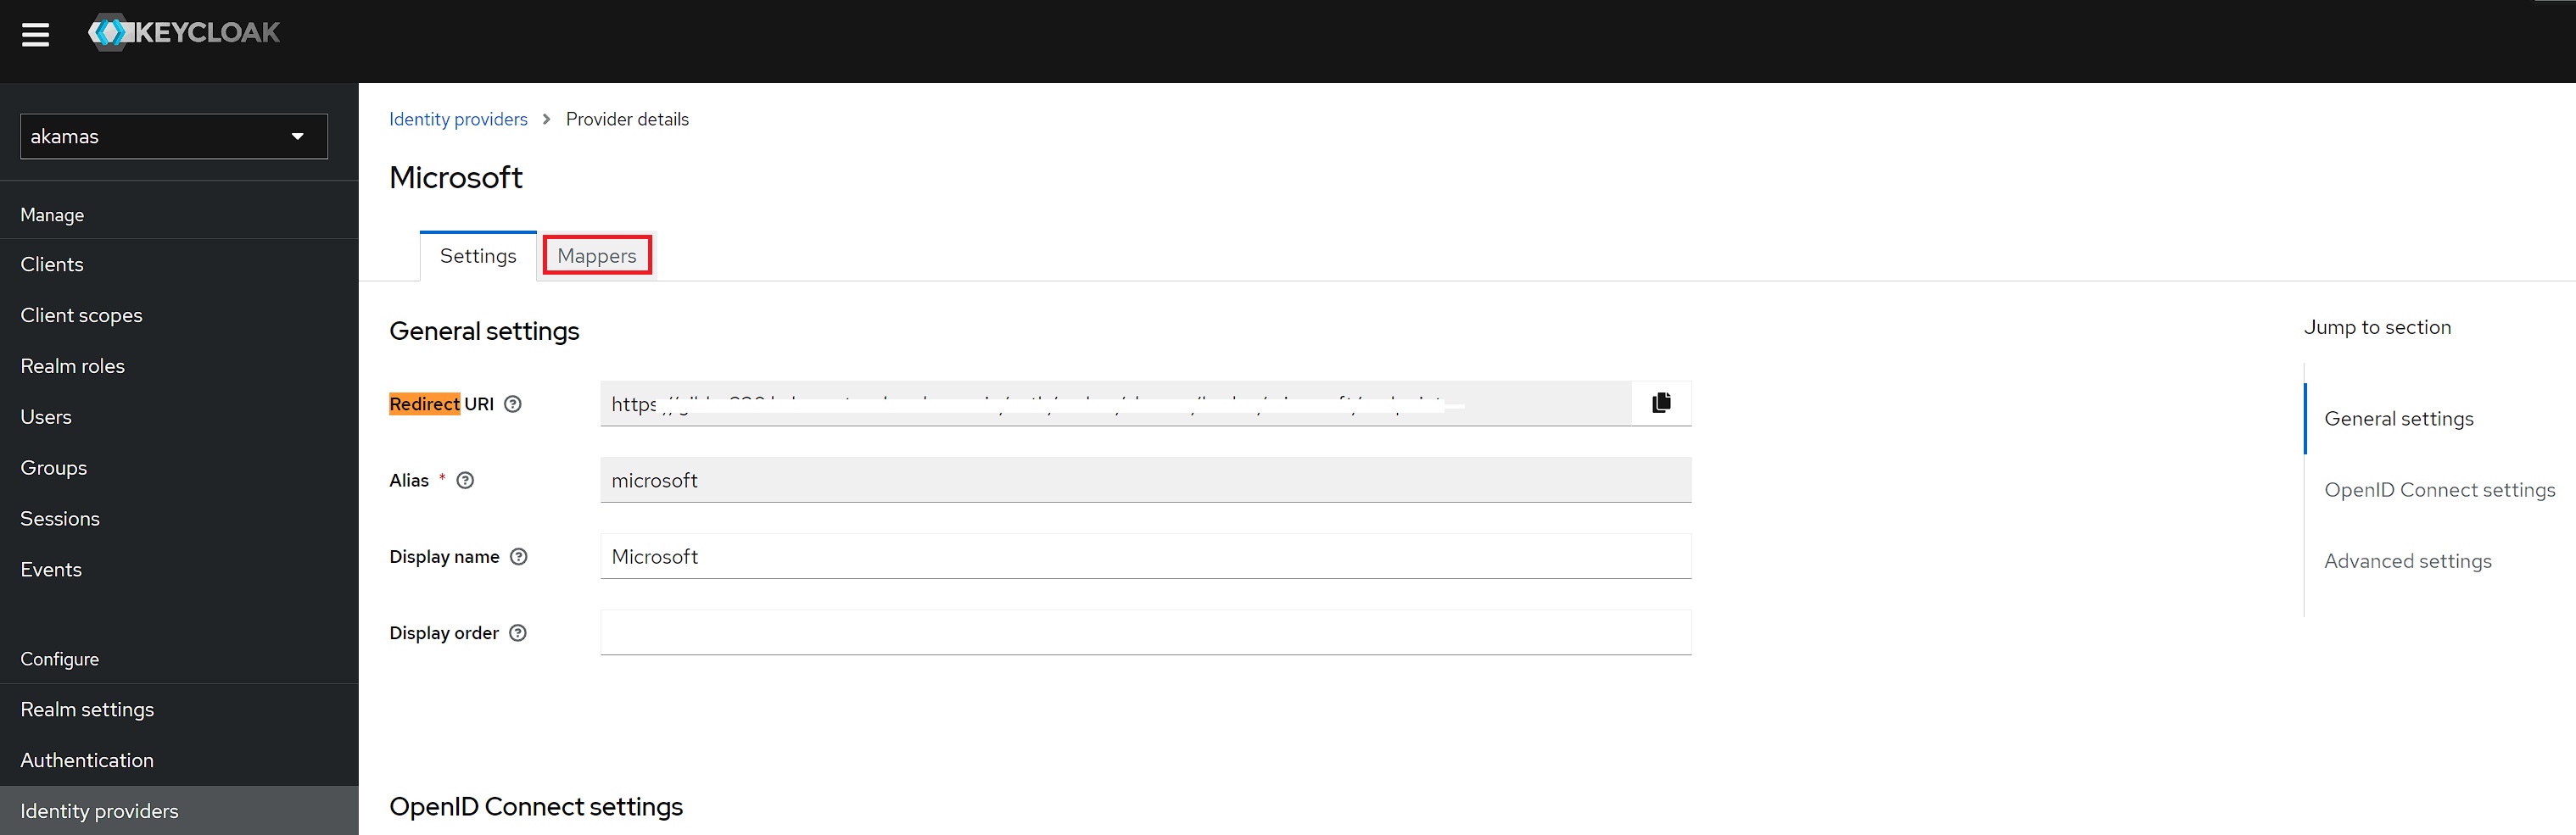
In Keycloak, go to the provider's details page and navigate to **Mappers**:
Add the following configurations:
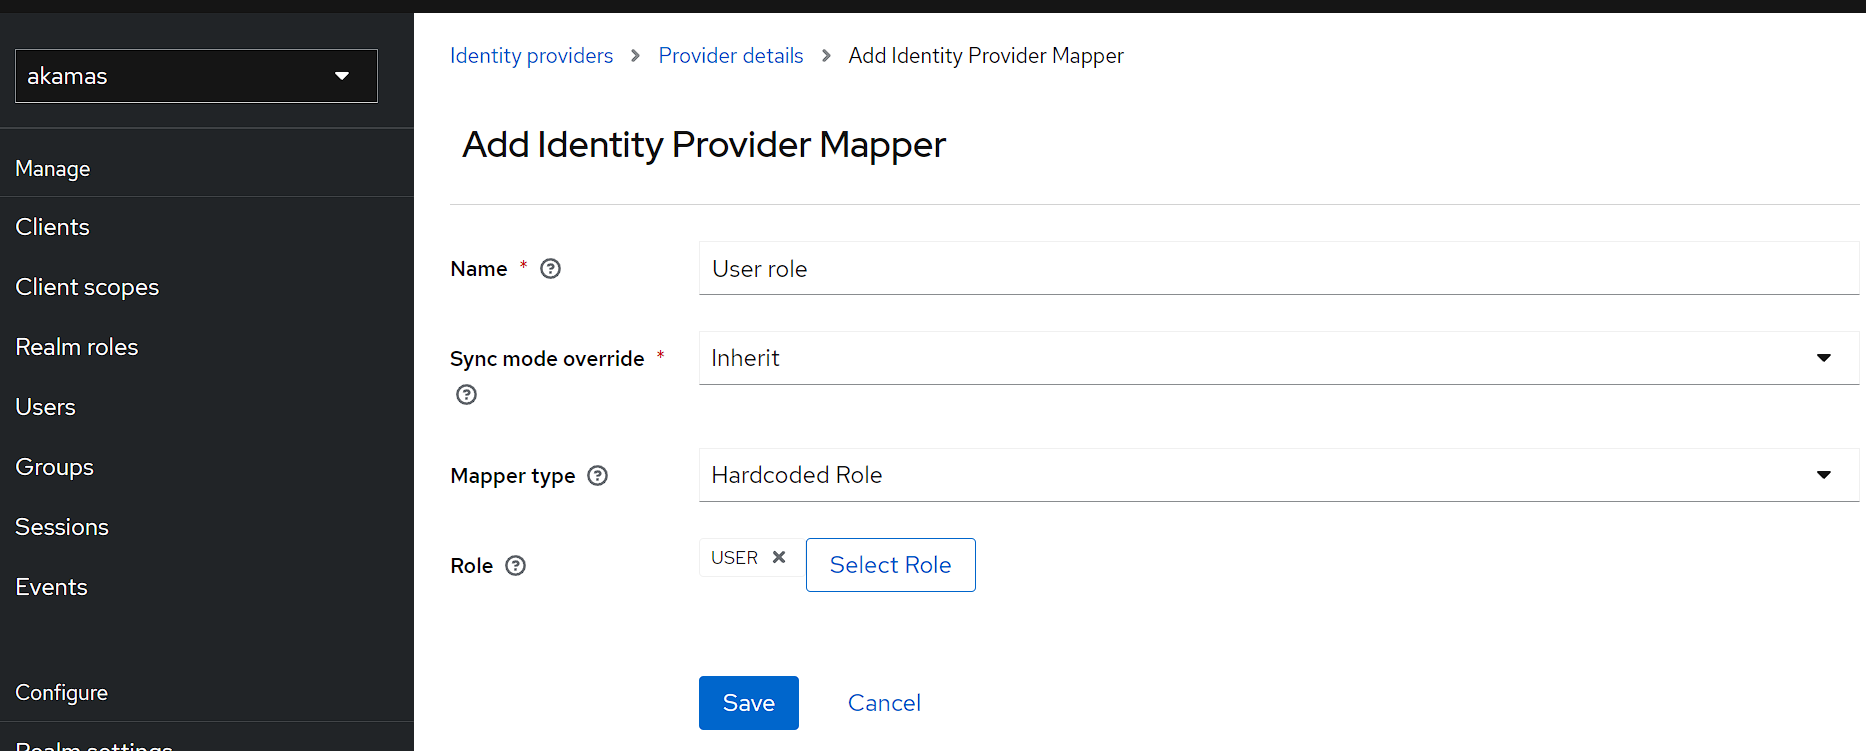
**User role**
* **Name**: *User role*
* **Mapper type**: *Hardcoded role*
* **Role**: *USER*
User Role map
**Default Workspace Read**
* **Name**: *Default Workspace Read*
* **Mapper type**: *Hardcoded role*
* **Role**: *WS\_ac8481d3-d031-4b6a-8ae9-c7b366f027e8\_R*
**Default Workspace Write**
* **Name**: *Default Workspace Write*
* **Mapper type**: *Hardcoded role*
* **Role**: *WS\_ac8481d3-d031-4b6a-8ae9-c7b366f027e8\_W*
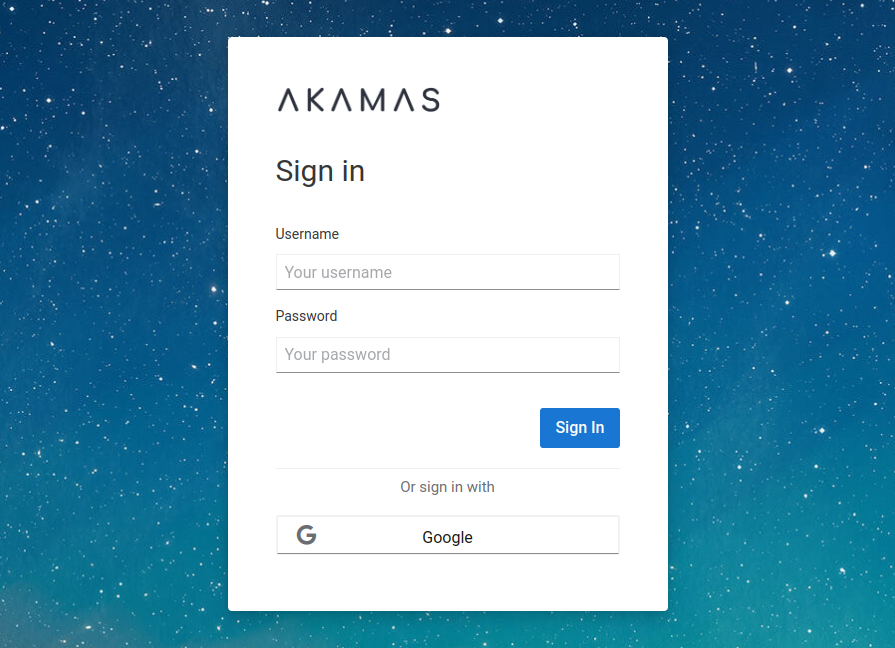
## Test the integration
Visit the Akamas installation's login page to verify that the new authentication method is displayed and working as expected.